How to Hair Extensions in 5 Easy Steps The Clip-in Method

Step 1 - clip in hair extensions should match the color of your hair
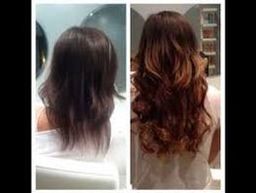
First, let’s start out with the basics. Your clip-in hair extensions should match the color of your hair, otherwise they are going to stand out, no matter how well you put them in. Also, keep in mind that wave and curl consistency throughout your real hair carrying on seamlessly through the clip in hair extensions, are key features to blending. If you need hair extensions we sell them at the salon. Check out our main hair extensions site at YTFhairextensions.com for more info, or give us a call today.
Step 2 - prepare your hair for the clip in hair extensions
The next step, prepare your hair for the clip in hair extensions you have just purchased, or made. The best way to do this is to separate your hair into upper and lower sections, starting from the left side of your hand and moving in a straight line over to the right; according to oprah.com.
Step 3 - line them up
If your Hair is thin it is a good idea to tease it first to help the clip-in hair extensions hold better and longer. Most clip in hair extensions are designed with 6 to 7 clips which all need to be in the open position before you line them up with the part you made earlier. ( the part in your hair.) With all clips in the open position, line up the top seam of the netting (on your extension) with the part you made in your hair. Make sure to attach the top middle clip first.
Step 4 - install the side clips
Next, you will want to install the side clips above each ear. First line up your hair extension with the part on both sides of your head. Make sure it is tight against your scalp when you are aligning. Then attach your clips.
Step 5 - attach the four lower clips
Lastly, attach the four lower clips near the bottom half of your hair line. Then all you need to do is let your hair down and blend in the clip-in extension!
Clip-in hair extensions are often less costly than other types of hair extensions and allow a temporary look instead of the more permanent fusion hair extensions or microlink hair extensions. Experiment and have fun with clip-in extensions until you find your look. Then you can spend a little bit more for something more permanent. Hope this article helps!
 RSS Feed